This covid season my family built a pizza oven as a project to keep ourselves occupied.
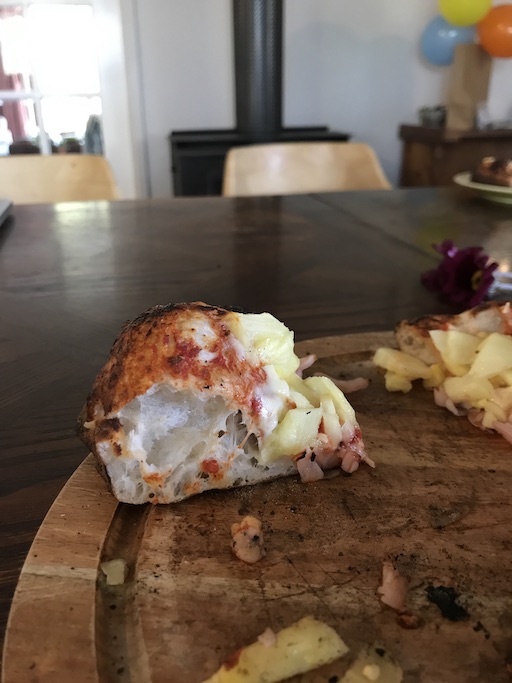
The pizza oven is a great way to make a heap of pies when hosting guests, and provides some theatre and excitement compared to simply cooking pies in the oven. Pies cook in 90s, often the oven is far too hot, and I have to allow it to cool down somewhat so I don’t scorch the pie base.
The oven retains heat within the cob walls, roof and fire brick floor. This allows it to continue to cook until lunch time the next day.
I’ll give some basic details about how we made this oven, some of the thoughts behind our decision making process and how we use the oven now that its built.
What type of oven to build
I like to make pizza. At least once a month but often more than that. Our kids love to eat pizza too. I wasn’t satisfied making pizzas in our oven. The oven doesn’t get very hot (approx 240C max) and the pies took 10 minutes to cook. I had switched to cooking the base on a frypan over a gas flame, then putting the pie in the oven under a grill to cook the top. The results were good. I can make a very good pie like this, but it was annoying to juggle the frypan around between gas top and oven grill, and it still took a long time to cook each pie, though I admit I never measured the time here, perhaps 5 minutes.
So I looked at alternatives, a dedicated appliance for cooking pizzas. There are some pizza cookers that sit in your kitchen, the ones I saw were around $600, though the components are so simple I’m sure you could find cheaper (its just a sandwich press for pizzas).
Then I also looked at outdoor gas fired pizza ovens. These were also expensive, and I felt like it was cheating to turn on some gas and cook a pizza. It isn’t really cheating at all they get very hot and would cook a good pie - but sometimes I like to do things the hard way, gas fired pizza is easy mode.
Then there is a dedicated outdoor pizza oven. There are kits you can buy. They were the most expensive of all. Over $2k for many of the kits. But the heat retention and build quality (assuming I can follow instruction) is excellent. I’ve read about these ovens retaining heat for many days afterwards. I would loved to have had one of these, but I couldn’t justify spending so much money.
Finally a friend in the town where I lived told me about how he made his pizza oven out of mud! I couldn’t believe it, so he invited me over for a pizza night and showed me how it all worked. I was hooked on the idea that I could make a pizza oven with mostly materials found around my house. Not only would it be cheap, but it sounded like a lot of fun.
Making the oven
I looked through a few blog articles, watched some youtube videos and bought a book on cob pizza making (by Kiko Denzer, you should be able to search for it). They all had a very similar method:
- Make a plinth/pedestal up to a ‘baking height’
- Make a layer of insulation to prevent heat leaking downward into your pedestal
- Lay a fire brick layer. This is your cooking surface and fire surface, it must be level.
- Build a form out of sand directly on top of fire bricks that will be the shape of your pizza oven cavity
- Lay a thick wall and roof of clay/sand on top of your sand castle.
- When the clay/sand is dried a little scoop the sand castle out, the pizza oven is now almost ready
- Insulate the inner clay/sand with something insulative (in my case with a ceramic fibre blanket)
- Put a nice thin outer layer of mud to make it look nice
There are other smaller steps I guess, but this is a very high overview not a complete guide.
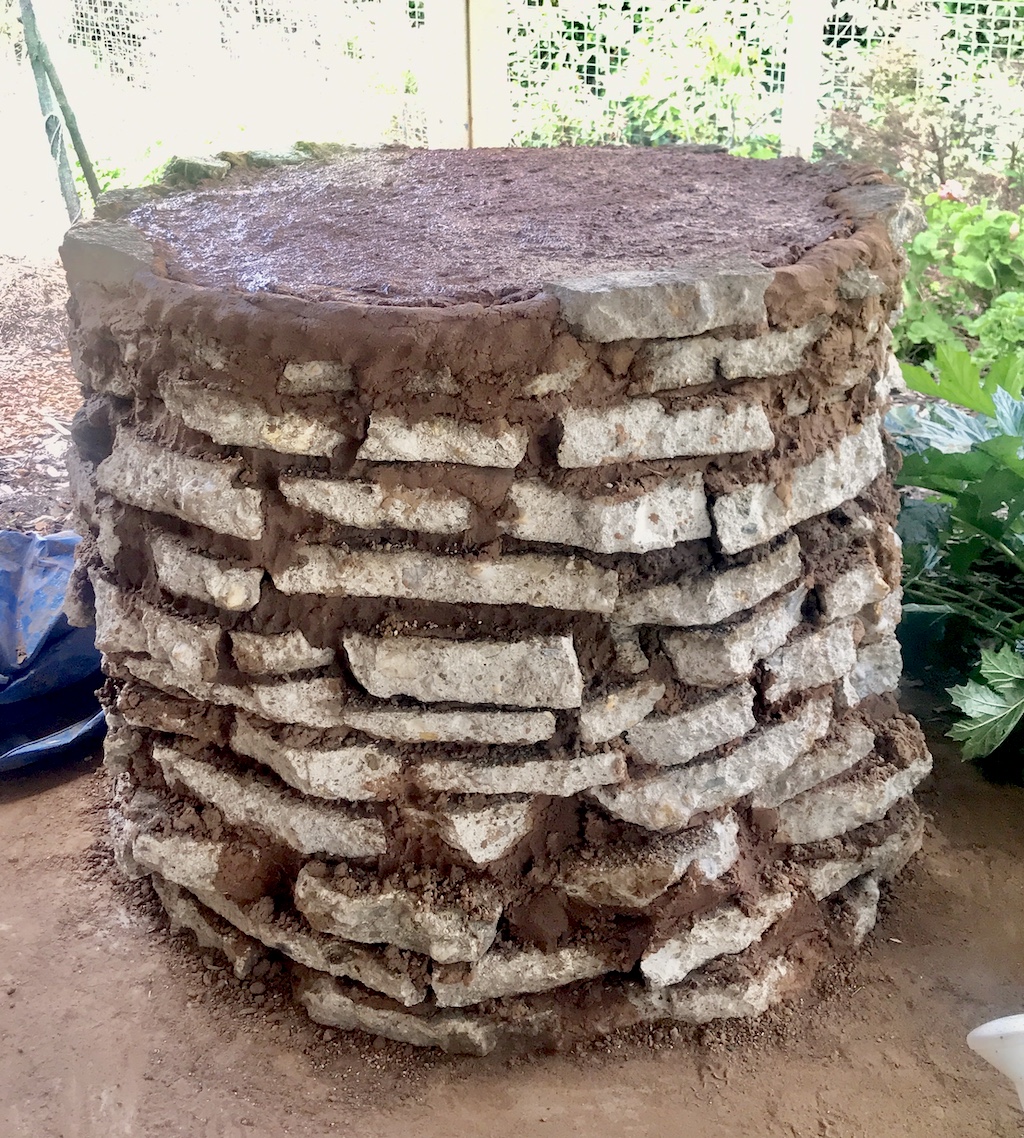
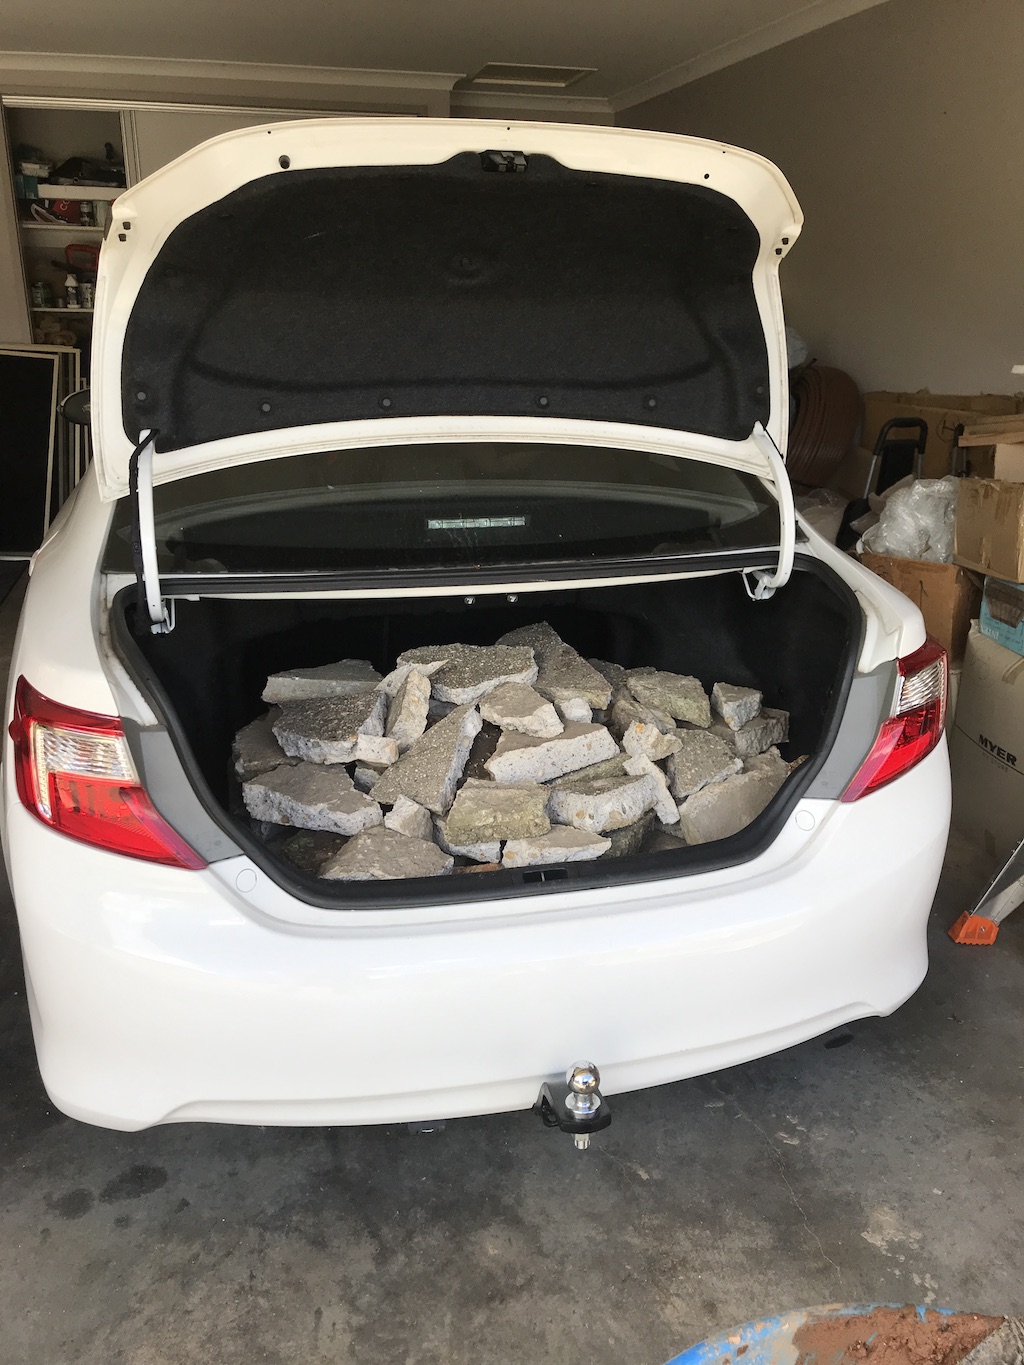
We had a load of free busted up concrete that someone near and dear to us wanted to get rid of. I happily accepted their offer and took 5 bootloads of it. That was enough to build the pedestal to near baking height and fill the middle with junky looking bits / other trash from around the house.
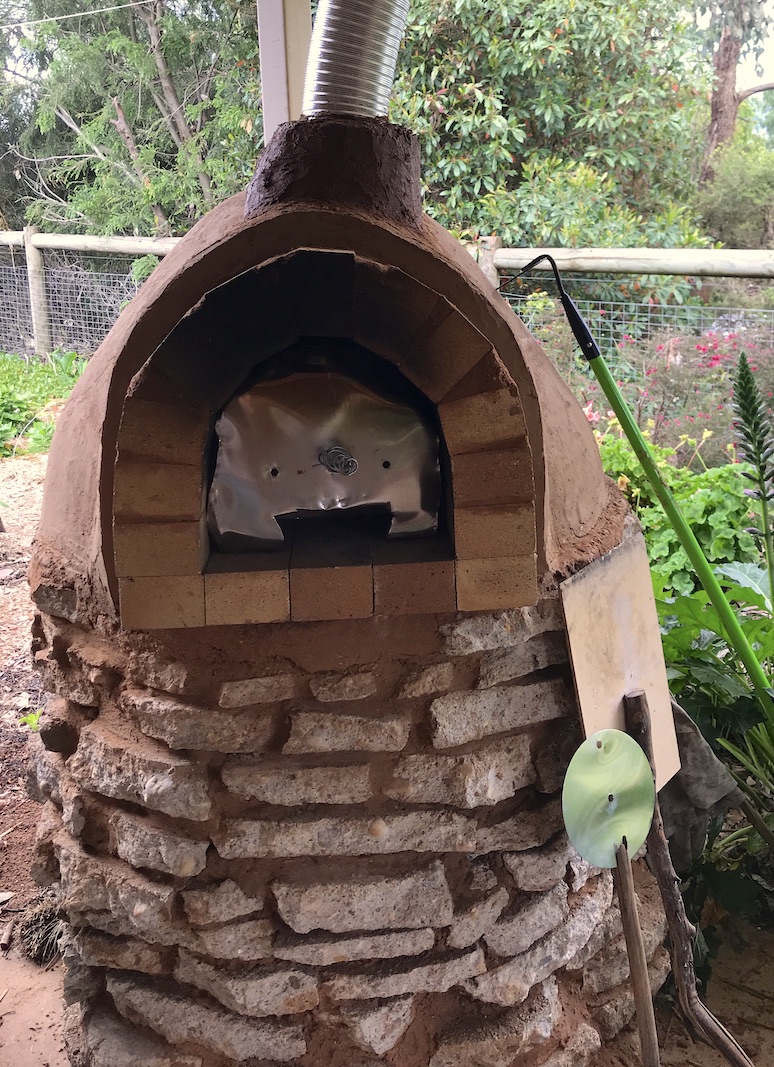
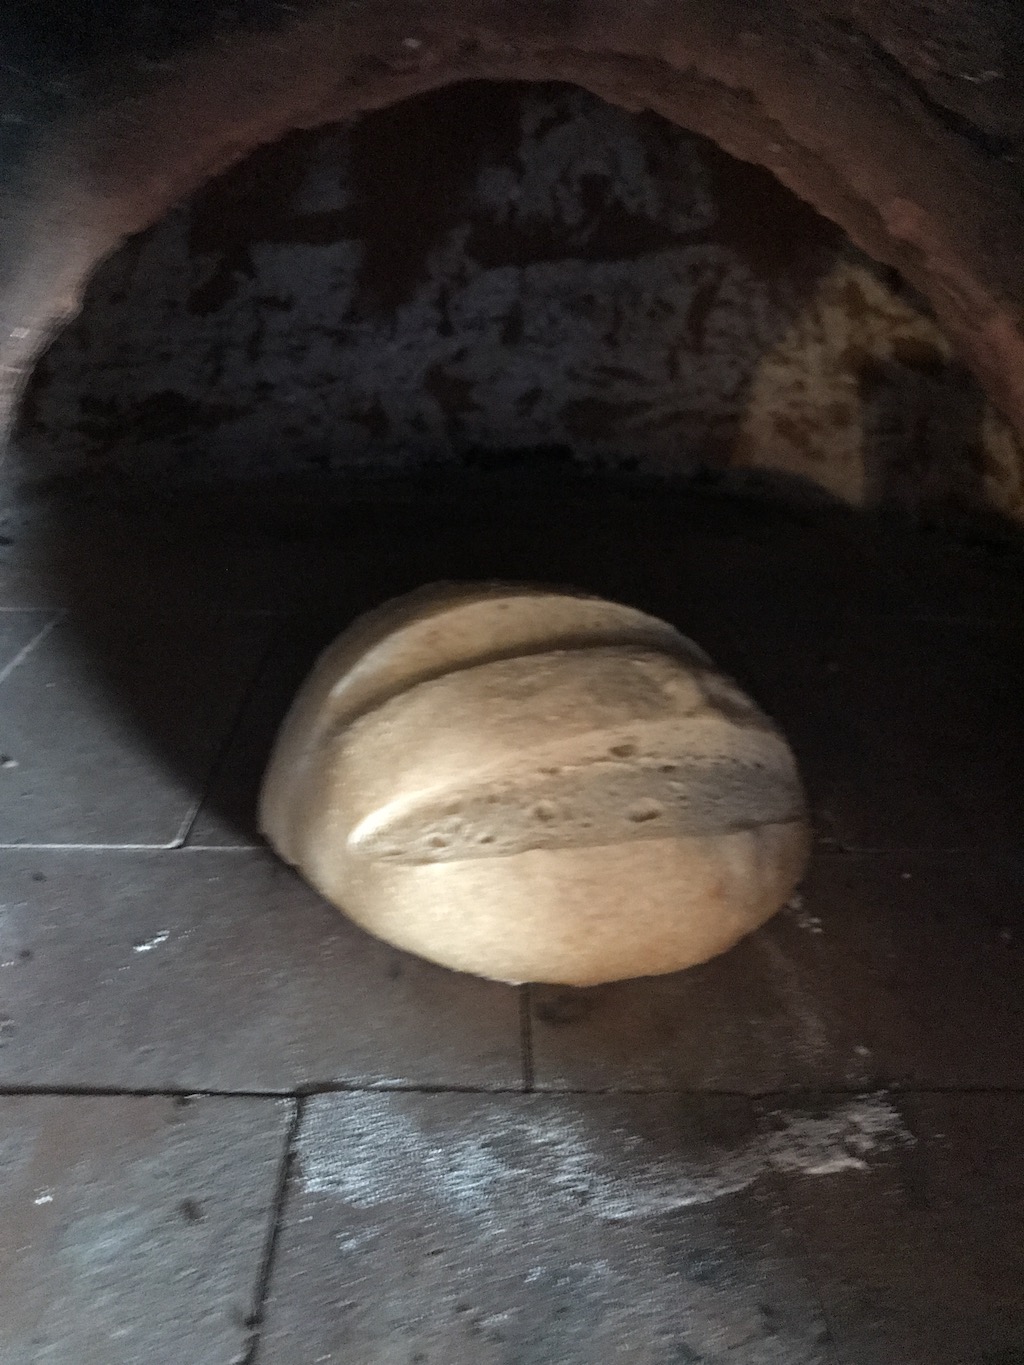
I wanted the oven to fit a ‘large’ pizza so the doorway needed to be 35cm, and the baking diameter is 70cm inside. Height of dome is 16” and height of door is approx 10”. The flue is about 5” - I have read that 6” is ideal for an pizza oven of this size though. That might be true, but I am happy with 5” flue so far.
Performance of the oven
The cob oven performs as well as I had hoped, but I was disappointed when I tried to compare heat retention against a masonry pizza oven kit - there are people on forums online bragging about 3-4 day cooking cycles from a single firing. If that is what you want, I’d suggest that cob won’t get you there.
Instead what you can expect is:
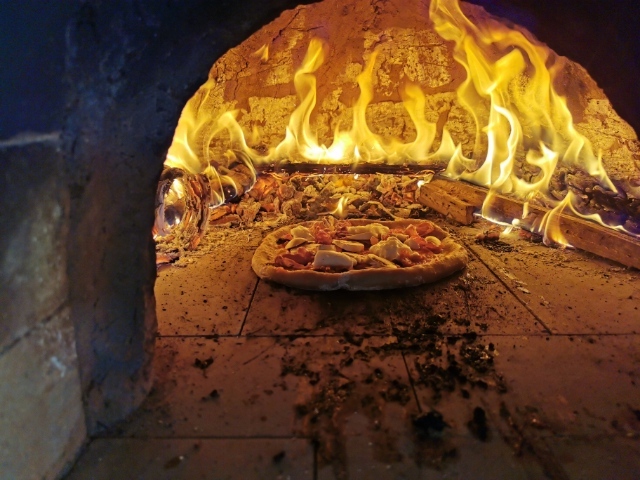
- the ability to cook 15 or more pizzas in a single firing extremely quickly (90s cook time)
- A short firing time 1hr 15 minutes to 1 hr 30 minutes is enough from when the fire is lit. I have fired for even longer 2hrs but it just made the oven too hot for pizza.
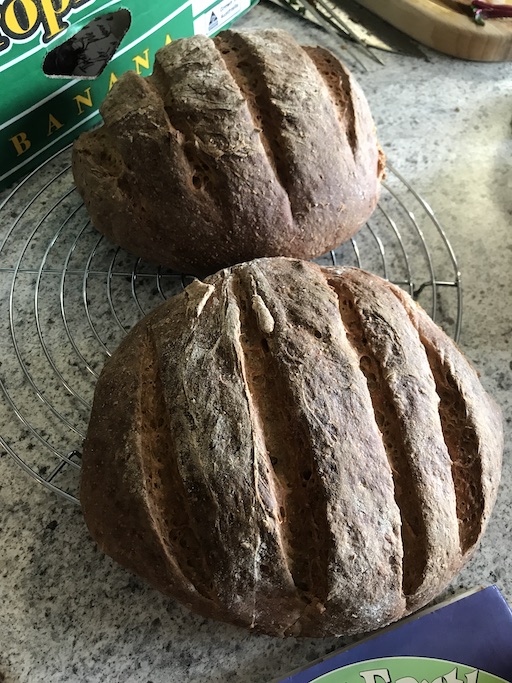
- After the pizzas are cooked (say 6pm) at 10-11pm the oven will have cooled from 400C+ down to 240C which is a decent (if a little hot) temp to cook a few sourdough breads.
- Then after the breads have baked, a hearty stew can be put in ready for either breakfast or lunch next day (100C at lunchtime following day)
- After I have cooked a pizza, bread and stew I put in some seasoned firewood and allow it to kiln-dry ready for next firing.
A single firing of our oven is about 1.5 ‘rounds’ of wood. Where I have decided that a ‘round’ of wood is a firebox length log (not split) of wood. Maybe this is 10kg? I use stringy bark, or any other decent fire wood I can find.
Total cost and thoughts what I am happy with and what I would do differently.
The total cost was:
- $280 for firebricks (base and arch)
- $100 for ceramic fibre blanket
- $100 on perlite
- $250 flue and installation through roof
- $16 bricky sand (1 scoop)
I could have saved $50 on the perlite if I had realised that I could just buy a large bag from ebay and not small bags from bunnings. The ceramic blanket (again ebay) could be replaced with a cob + straw insulation which is free but I am pleased I spent the extra cash here. I can’t really feel any heat escaping out of the walls or roof, so it must be doing its job well enough.
I chose to make a bricky sand + clay mortar for the pedestal. This helped me get to baking height without as much concrete required, but it was a real pain to dig up and mix so much mortar! If you have an opportunity to build a dry stack pedestal or mount the pizza oven on something existing you’ll save yourself so much time. The oven itself was easy, the pedestal was hard!
Make sure you have some extra hands to help on the day you build the pizza oven. This is because some of it is time sensitive and you don’t want the sand form drying out before you’ve finished laying your oven walls and roof.